CVE-2022-22733: Apache ShardingSphere ElasticJob-UI privilege escalation
Introduction
A vulnerability discovered in Apache ShardingSphere ElasticJob-UI known as CVE-2022-22733, The vulnerability lead to exposure of sensitive informatiopns and as a results it allows an attacker who has guest account to do privilege escalation.
Testing Lab
For the testing lab the vulnerability affecting version 3.0.0 and prior versions. So, we can use docker to build our testing lab, First pull the docker image:
sudo docker pull apache/shardingsphere-elasticjob-lite-ui:3.0.0
Now, Let’s run the app:
sudo docker run -d --name elasticjob-ui -p 8088:8088 -e ELASTIC_JOB_GUEST_ENABLED=true apache/shardingsphere-elasticjob-lite-ui:3.0.0
Here it will run the app and enable the guest access, Therefore we can simulate and reproduce the vulnerability.
What is ShardingSphere ElasticJob-UI ?
ShardingSphere ElasticJob-UI is a web-based graphical user interface (GUI) that is part of the ShardingSphere ElasticJob project and provides an easy-to-use interface to manage, monitor, and visualize the status of jobs running in a ShardingSphere ElasticJob cluster. It simplifies the management and administration of distributed scheduling tasks, making it more convenient for users to manage their jobs without dealing directly with the underlying API or configuration files.
Static Analysis
Let’s Open burpsuite and take a look at the login request and response.
In the above screenshot when we login, It provide us back with a response contains the accessToken. If we copy the accessToken value and decode it:
As we can see after decoding the value, It’s exposed the guest username and password which is the user we logged-in with & Also exposed the root username and password, As a results we can use the exposed root creds and escalate our privileges. Let’s see the root cause of this issue by analyzing and going through the login/authentication process code. Now, Under the following class org.apache.shardingsphere.elasticjob.lite.ui.security.AuthenticationFilter we can see the following:
Which obvuise is the endpoint where the authentication process happens, Let’s dig deeper into the class code:
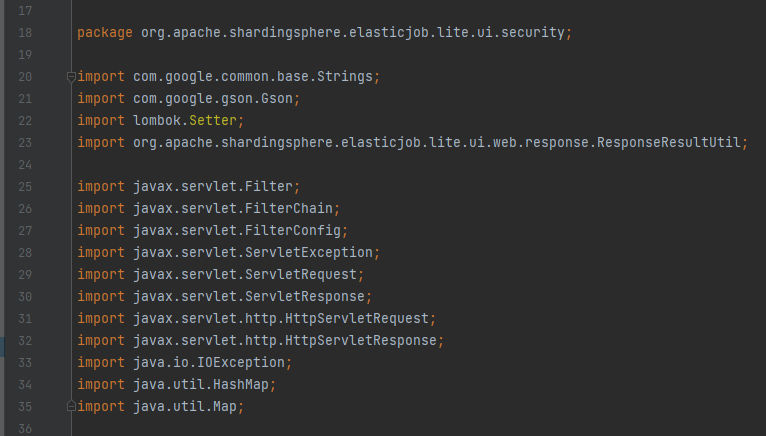
First, It’s defining the package and import needed libraries by scrolling down we can see the start of defining the class:
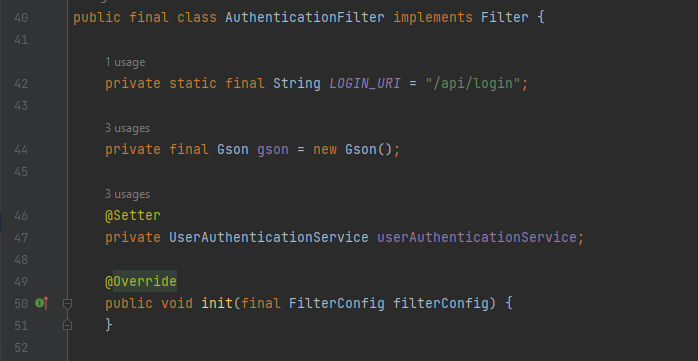
This AuthenticationFilter class implements the Filter interface and has a constant LOGIN_URI that represents the URI for the login endpoint, a Gson object for JSON serialization and deserialization, and a UserAuthenticationService object from the UserAuthenticationService class that can be set using a setter method. If we go to that class under the same location we will be able to see that it’s responsiable to check for the user in the authentication process. In other words, It’s a main part of the authentication. As we mentioned before about the Filter interface, It’s basically a part of the Servlet API and is used to define filters that can intercept requests and responses going to and coming from a web application, For example, modifying request parameters, add or modify request headers, perform logging, and even transform the response returned by the server. Something important we have to know about the Filter interface and It’s that the Filter interface contains three methods:
-
init(FilterConfig config): This method is called when the filter is initialized and It allows the filter to perform any initialization that is required. -
doFilter(ServletRequest request, ServletResponse response, FilterChain chain): This method is called for every incoming request that matches the filter mapping and It allows the filter to examine or modify the request, perform any filtering logic, and then pass the request on to the next filter in the chain or to the servlet. -
destroy(): This method is called when the filter is destroyed and It allows the filter to perform any cleanup that is required.
By completing our lines of codes we can see thedoFilter()method:
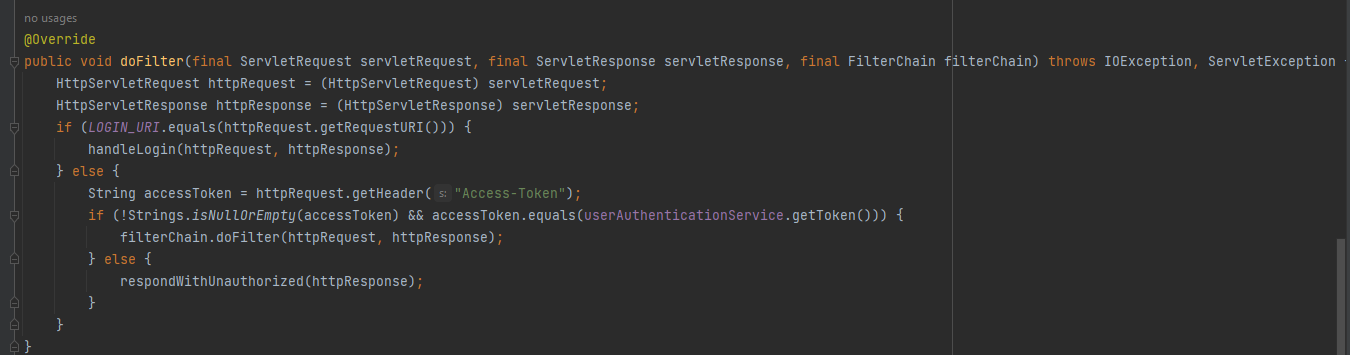
The method takes three parameters servletRequest, servletResponse and filterChain, servletRequest and servletResponse parameters are instances of the ServletRequest and ServletResponse interfaces, respectively. The filterChain parameter is an object that represents the next filter in the chain or the servlet that the request is being sent to. Then, The method first casts the ServletRequest and ServletResponse objects to HttpServletRequest and HttpServletResponse, respectively. After that it checks if the request URI matches the LOGIN_URI constant. If it does, the handleLogin method is called to handle the login request and If not the method checks if the request has a valid access token by checking the value of the Access-Token header. If the access token is valid, the request is passed on to the next filter in the chain using the doFilter method of the FilterChain object. Otherwise, the respondWithUnauthorized method is called to return an unauthorized status code to the client.
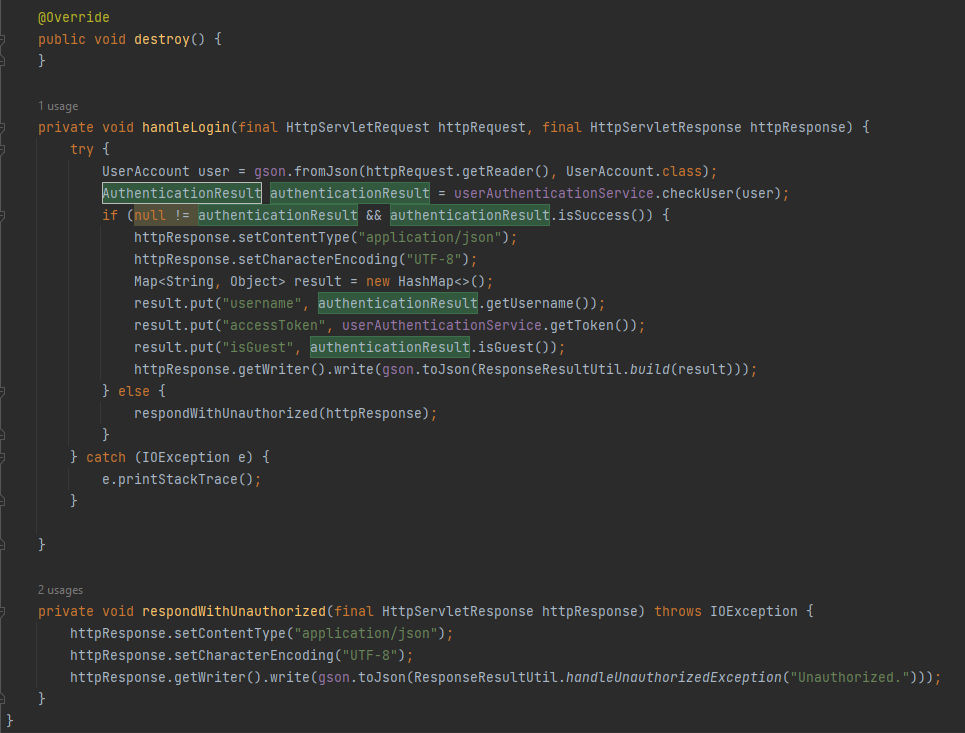
The destroy() method is empty and is used to clean up any resources used by the filter and handleLogin method is responsible for handling user login requests. It receives a HttpServletRequest object, which contains the user’s credentials, and a HttpServletResponse object, which is used to return the server’s response.It’s first reads the user’s credentials from the request using the getReader method and converts them to a UserAccount object using the gson.fromJson method. Then calls the checkUser method of the userAuthenticationService object to check the validity of the user’s credentials. If the credentials are valid the method creates a HashMap object to hold the user’s information, including their username, accessToken, and whether they are a guest user. It then writes this information to the response using the httpResponse.getWriter().write method after converting it to a JSON string using the gson.toJson method. If the user’s credentials are invalid, the method calls the respondWithUnauthorized method, which writes a JSON string to the response indicating that the user is unauthorized.

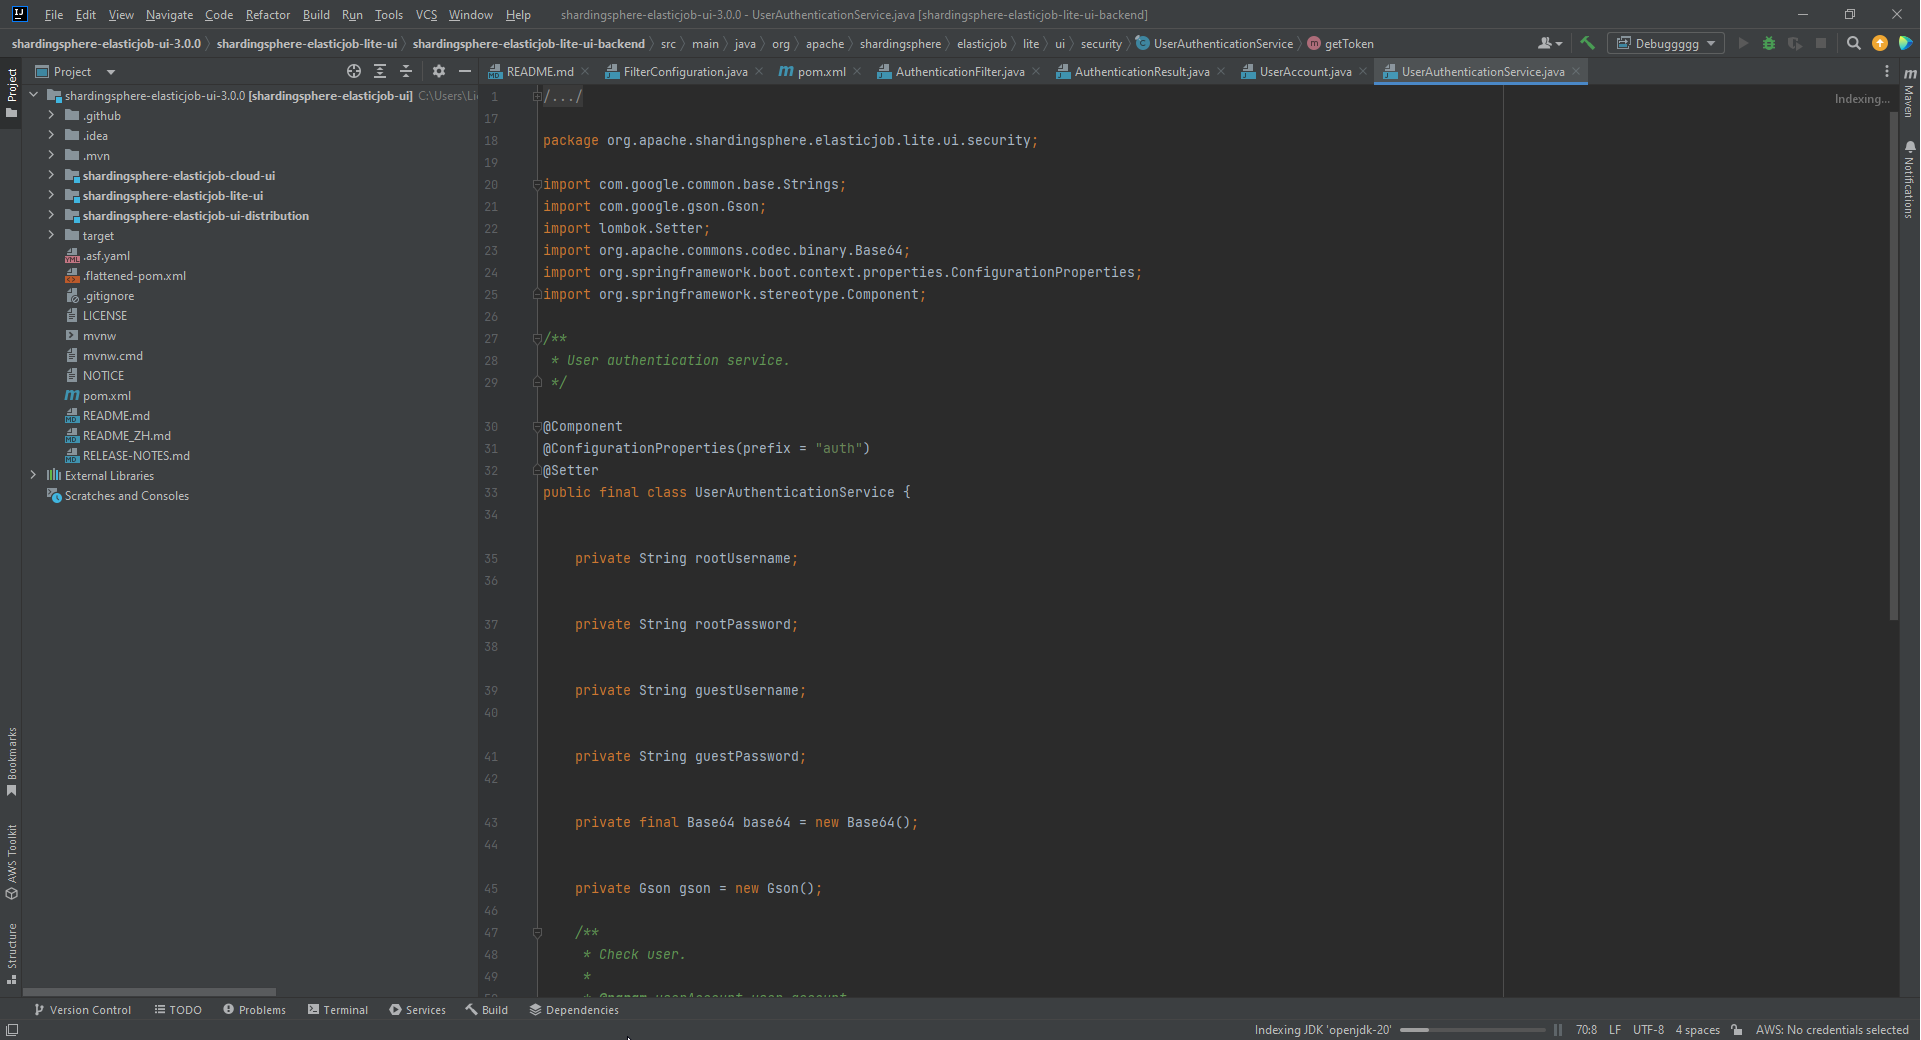
In this line we can notice it’s where the accessToken returned to the user and it’s being called from the getToken() method from userAuthenticationService object which is the userAuthenticationService class. Now, If we go to the class:
package org.apache.shardingsphere.elasticjob.lite.ui.security;

import com.google.common.base.Strings;
import com.google.gson.Gson;
import lombok.Setter;
import org.apache.commons.codec.binary.Base64;
import org.springframework.boot.context.properties.ConfigurationProperties;
import org.springframework.stereotype.Component;

/**
 * User authentication service.
 */
@Component
@ConfigurationProperties(prefix = "auth")
@Setter
public final class UserAuthenticationService {

    private String rootUsername;

    private String rootPassword;

    private String guestUsername;

    private String guestPassword;

    private final Base64 base64 = new Base64();

    private Gson gson = new Gson();

    /**
     * Check user.
     *
     * @param userAccount user account
     * @return check success or failure
     */
We can see that it starts with defining the package, class and some variables which we can see in the accessToken when we decoded it such as rootUsername, rootPassword, guestUsername & guestPassword and creates a new Base64 object along with JSON object to store data into.
    public AuthenticationResult checkUser(final UserAccount userAccount) {
        if (null == userAccount || Strings.isNullOrEmpty(userAccount.getUsername()) || Strings.isNullOrEmpty(userAccount.getPassword())) {
            return new AuthenticationResult(null, null, false, false);
        }
        if (rootUsername.equals(userAccount.getUsername()) && rootPassword.equals(userAccount.getPassword())) {
            return new AuthenticationResult(rootUsername, rootPassword, true, false);
        }
        if (guestUsername.equals(userAccount.getUsername()) && guestPassword.equals(userAccount.getPassword())) {
            return new AuthenticationResult(guestUsername, guestPassword, true, true);
        }
        return new AuthenticationResult(null ,null, false, false);
    }
     /**
     * Get user authentication token.
     *
     * @return authentication token
     */
    public String getToken() {
        return base64.encodeToString(gson.toJson(this).getBytes());
    }
}
After that It provides a method to check user authentication by comparing the provided username and password with the pre-configured root and guest usernames and passwords. Finally, We can see the getToken() method that encodes the current UserAuthenticationService object as a Base64 encoded string which is returned as the authentication token (accessToken) and here comes the vulnerability with the getToken() method is returning the Base64 string with representation of the entire UserAuthenticationService object including the root username and password. As a results it’s exposed as we saw in the first of the analysis.
Dynamic Analysis
Now, Let’s Setup our lab in debugging mode to see how it works dynamically. As we pulled the image before we will just run it again with a different name and port.
sudo docker run -d --name elasticjob-ui-debug -p 8888:8088 -p 8000:8000 -e ELASTIC_JOB_GUEST_ENABLED=true -e JAVA_TOOL_OPTIONS="-agentlib:jdwp=transport=dt_socket,address=8000,server=y,suspend=n" apache/shardingsphere-elasticjob-lite-ui:3.0.0
Here we added a new port mapping which is 8000 for debugging and also added new environment variable to set debugging options JAVA_TOOL_OPTIONS="-agentlib:jdwp=transport=dt_socket,address=8000,server=y,suspend=n" & Finally, a port mapping for the web interface of the application 8888 to 8088. Now, It’s time to setup our debugger through IntelliJ IDE, We need to download the ShardingSphere version 3.0.0 source code from github and open it as a new project inside IntelliJ IDE.
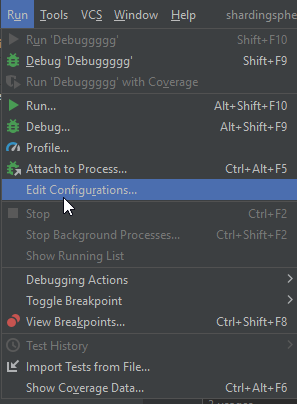
After that go to Run Tab and then click on Edit Configurations:
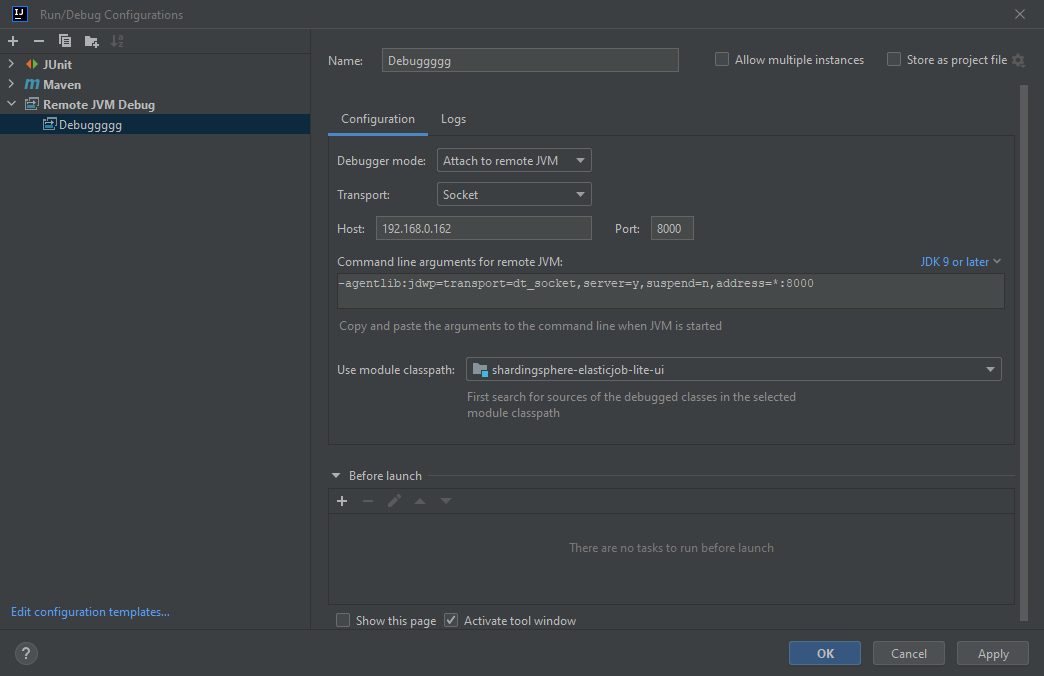
Then Click on the + add sign and choose Remote JVM Debug:

And Name it as you want & configure the remote debugger, By adding the machine docker IP, Debugging port which is 8000 and the module to debug which is the ShardingSphere-ElasticJob-lite-UI:
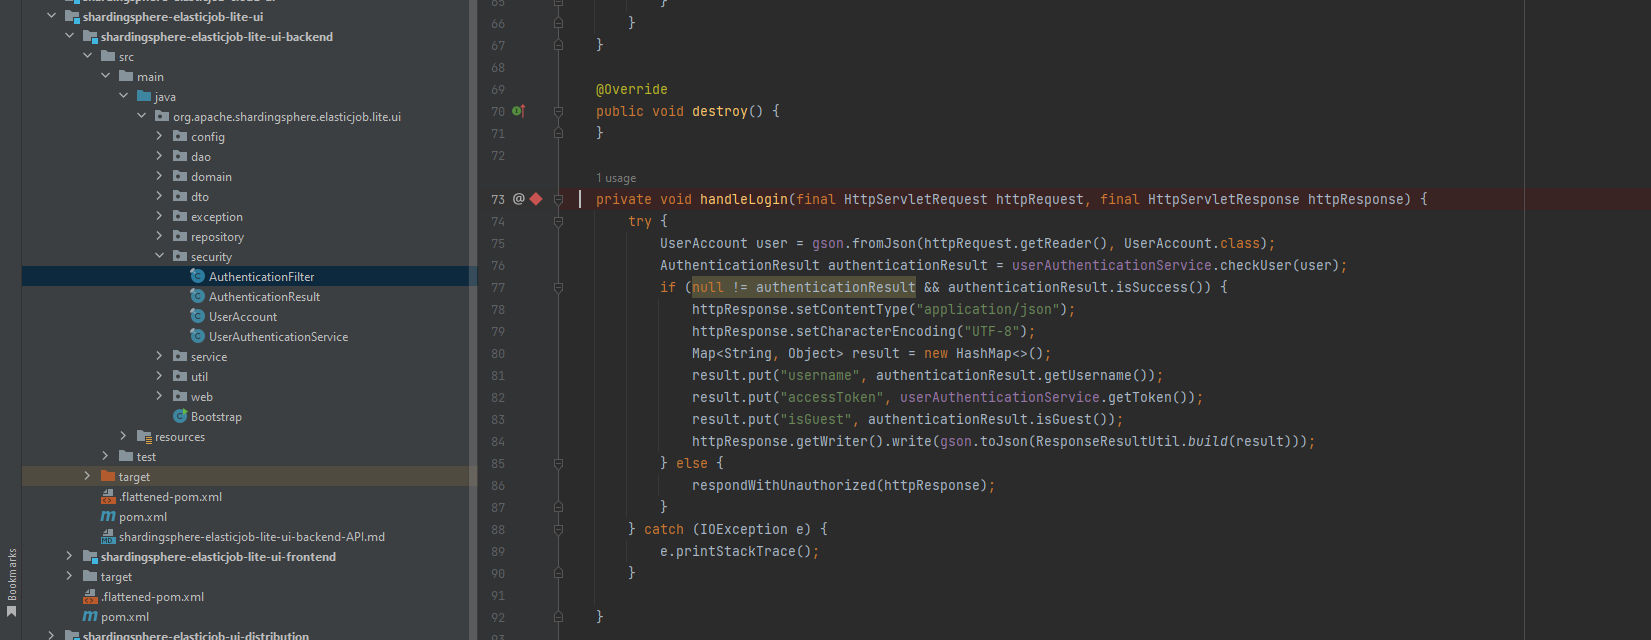
Finally, Let’s set our breakpoint on the handlelogin function under the org.apache.shardingsphere.elasticjob.lite.ui.security.AuthenticationFilter class:
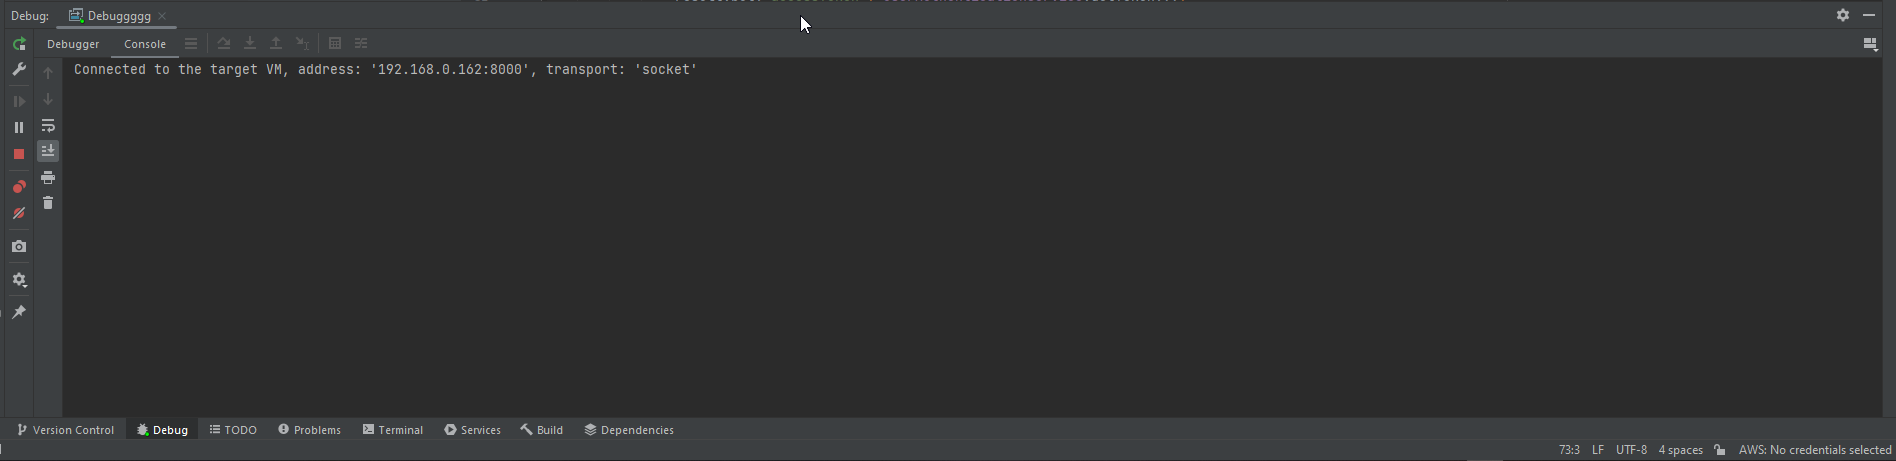
Now, Press on the debug button:

We can see it’s telling us that’s connected successfully to the targeted VM debug:
Let’s visit the application on our browser and login. Once we hit the Login button, We will be able to see that it’s hit the breakpoint and our debugger is working:

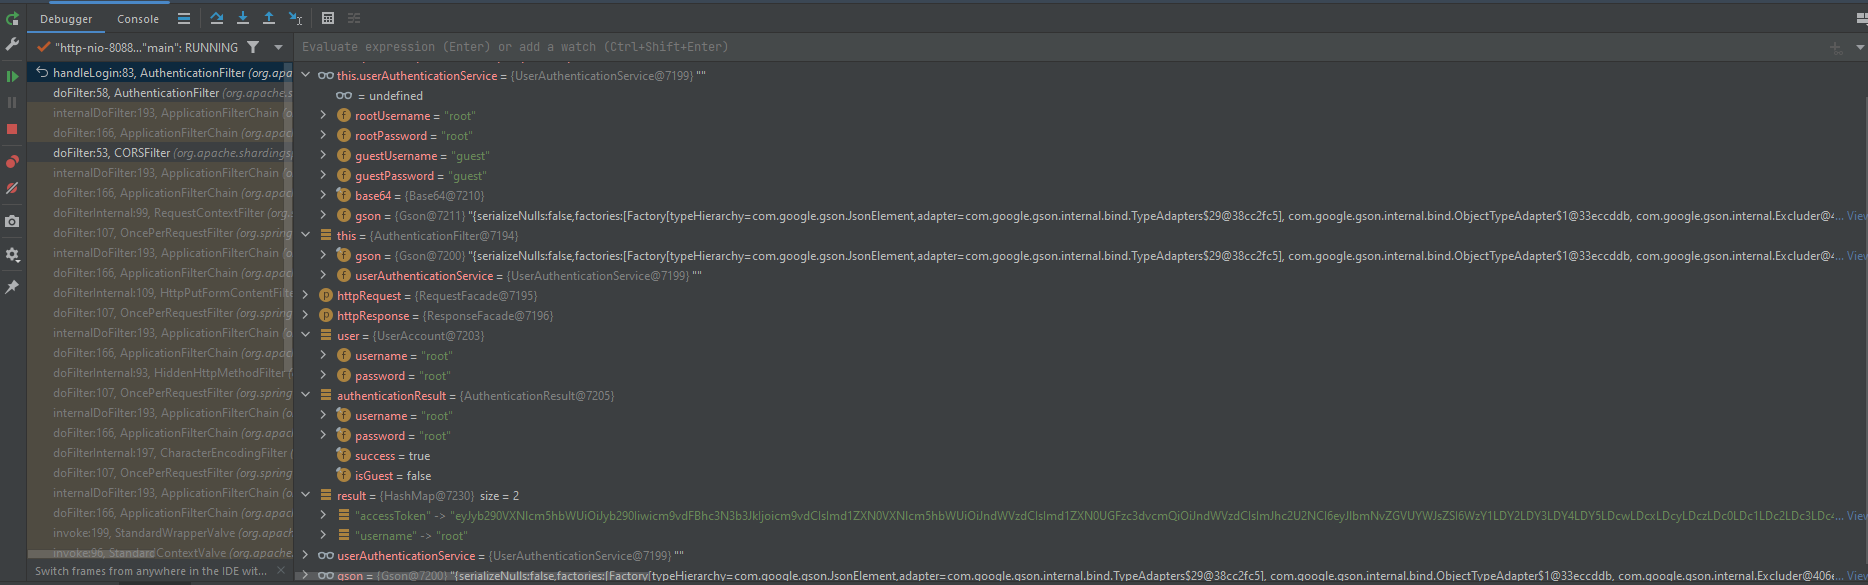
Here under this in the debugger which refers within the AuthenticationFilter class that it has the UserAuthenticationService Object which is made out of the UserAuthenticationService class itself:

We can see that it’s already carry the guest & root names and passwords, Along with the created Objects of Base64 and Gson. Now, Let’s step over and set a breakpoint to line where accessToken get added to the request:

In the above screenshot as we see, By stepping over until we arrive to checkUser() function which is taking the credentials entered by user.
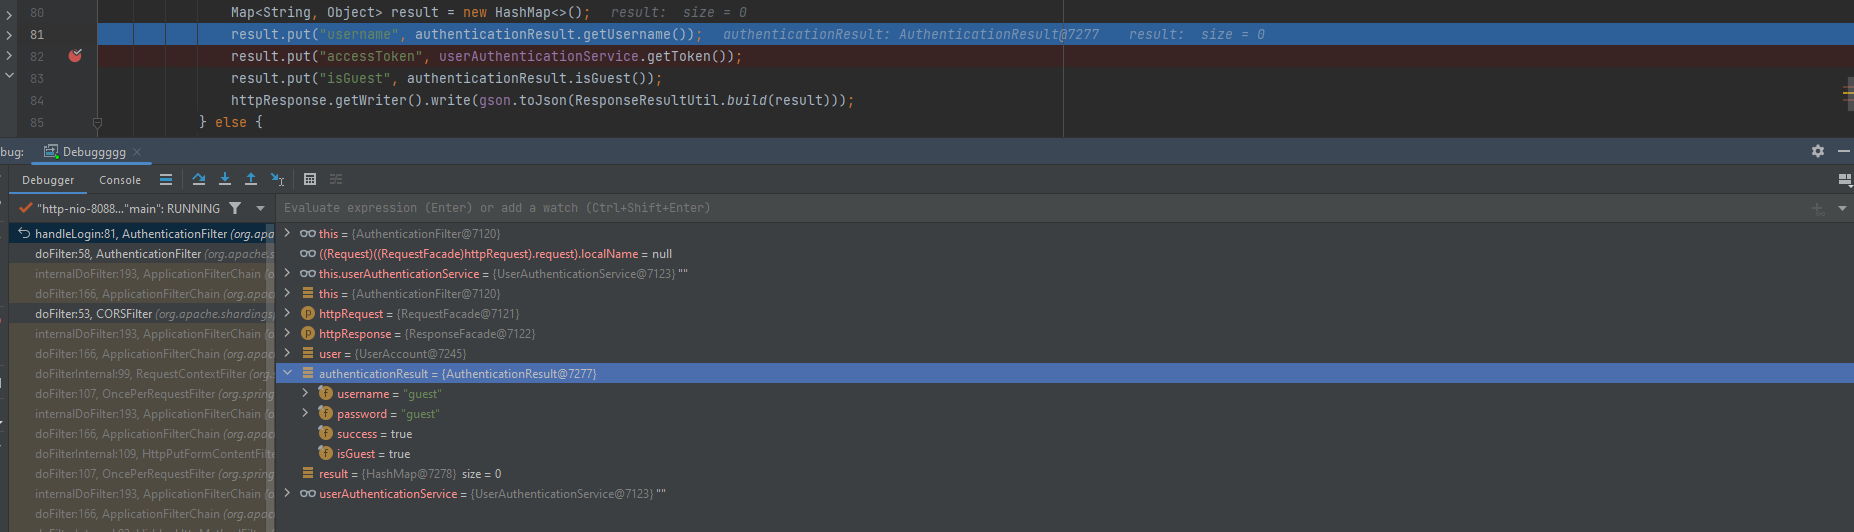
By stepping over 2 more steps we can see that the authenticationResult started to created & Mentioned under it the username,password which are our credentials, success which is the authentication status and in this situation it’s true as credentials matched & Finally, isGuest which indicates if the user is a guest or no and in our case yes it’s.
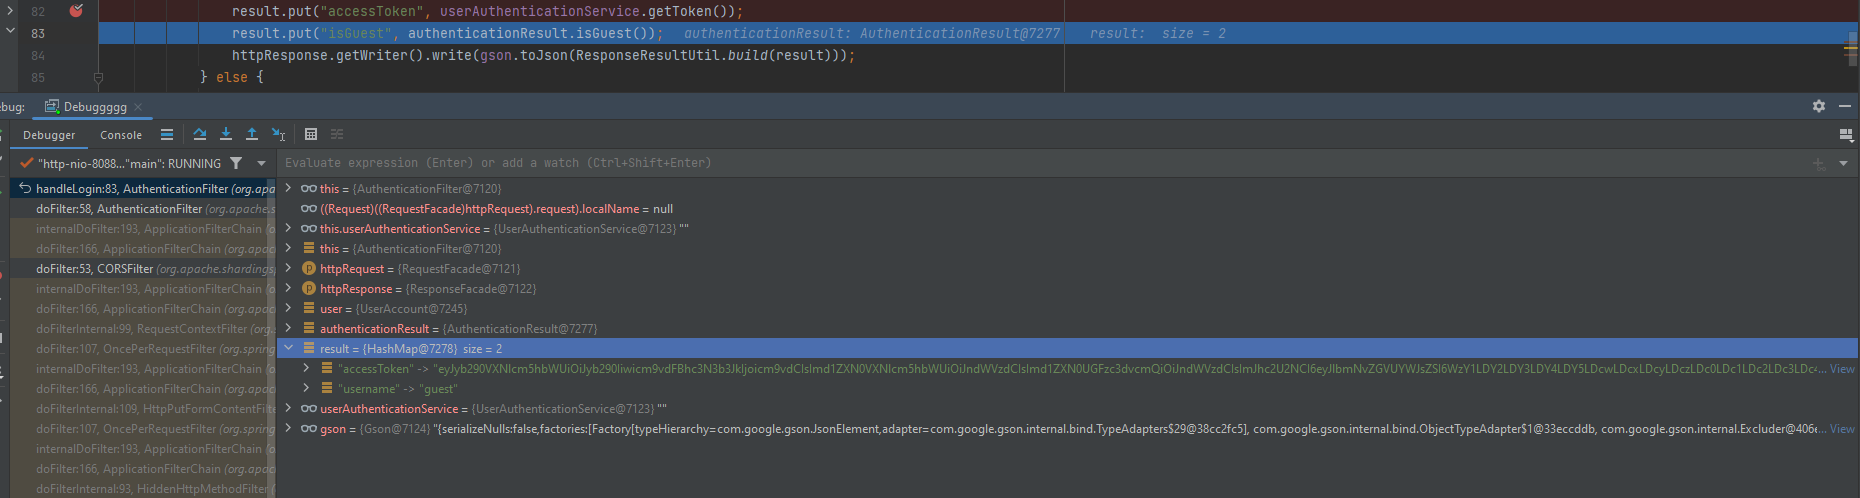
here we can see the result which is a HashMap and will be sent with the response body. Clearly it’s generated the token and if we take this value & decode it we will be able to see the exposure of the root username and password, along with the guest username and password that loaded at first of the debugging in a refer with the UserAuthenticationService class object. If we do the same with the root account we obtained from the token which is root:root & see how it will be remain the same and will return the both users accounts in the token as we can see in the below screenshot:
Patch Diffing
Now, Coming to the patches that applied on the code, It’s a lot of modifications but, we will focus on the modifications made for the classes.
UserAuthenticationService.java
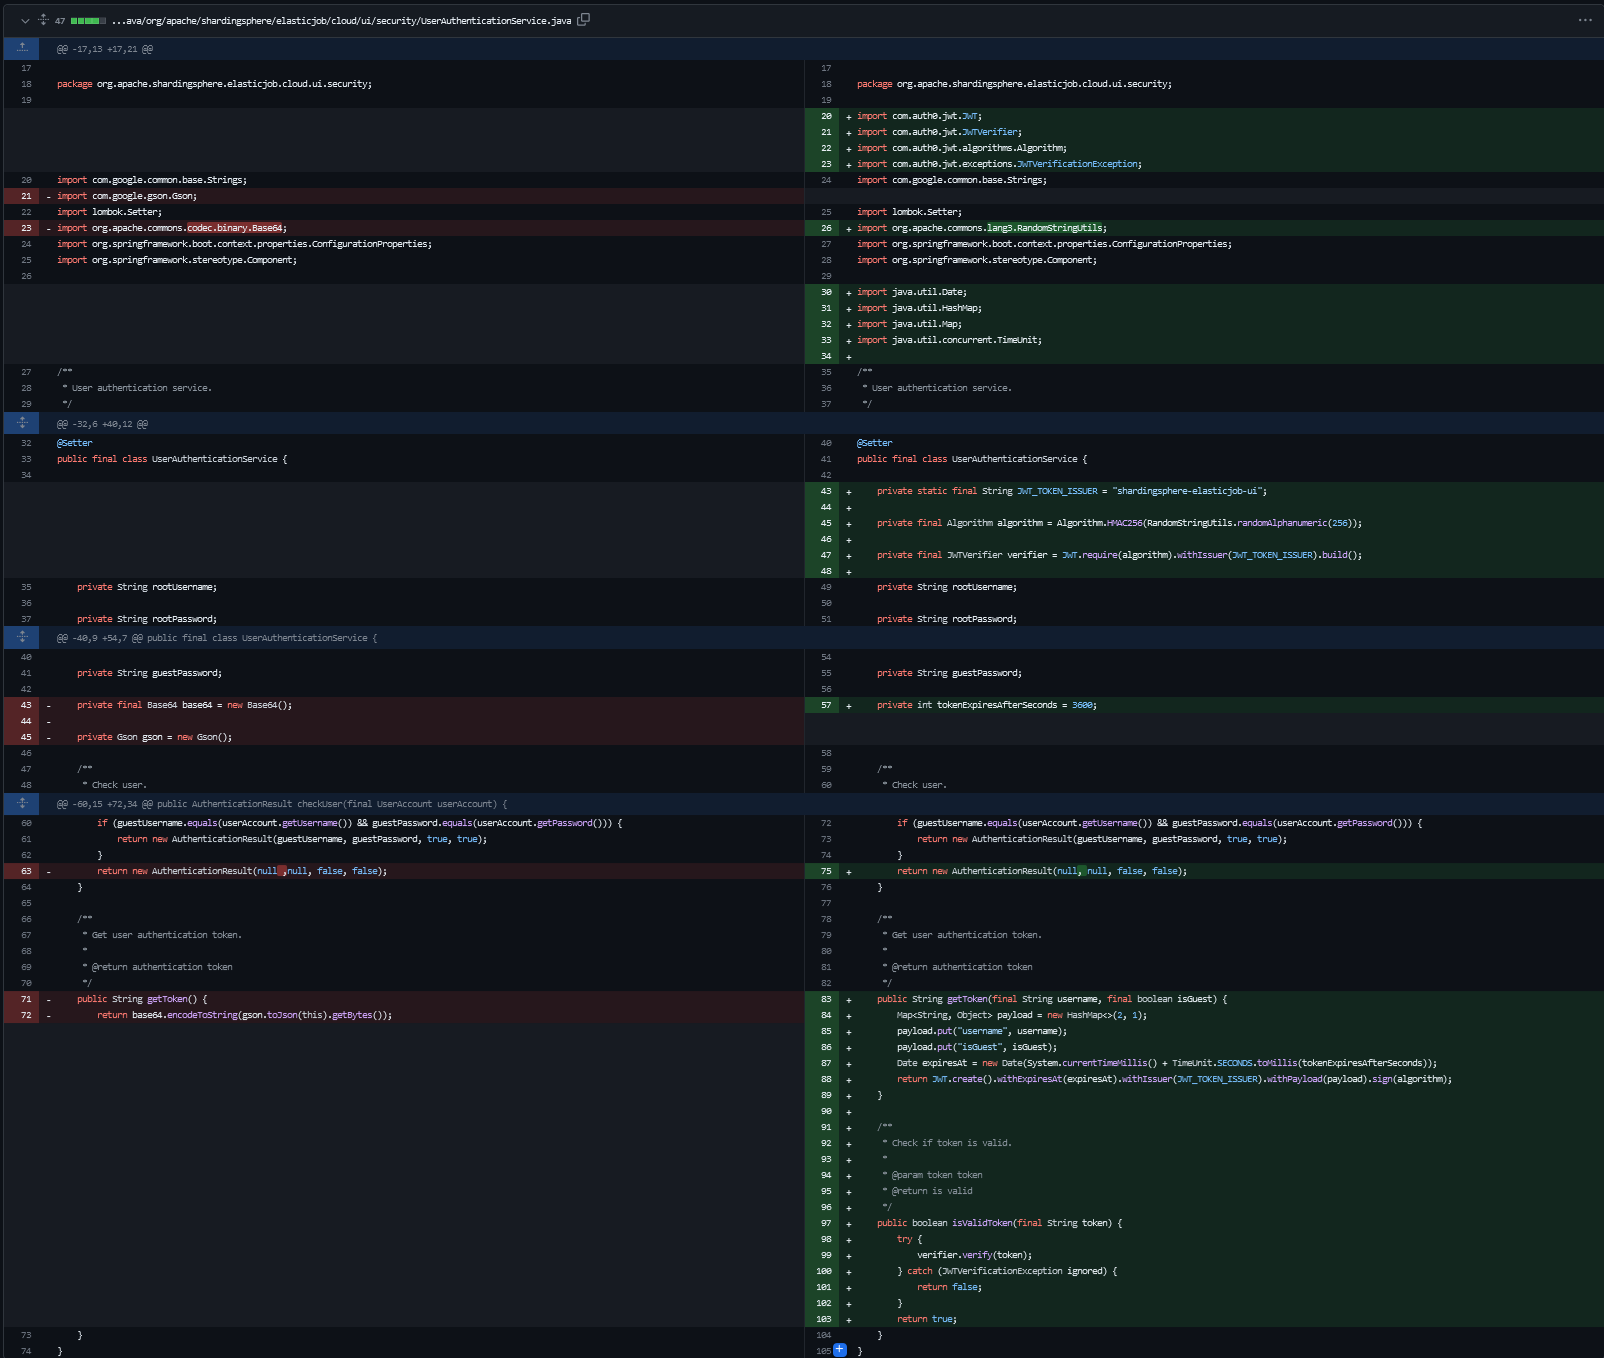
The vulnerability in the original code block is that the getToken() method of the UserAuthenticationService class returns a token that contains the root username and password in plaintext which used in the doFilter() method to authenticate the user, which allows an attacker to extract the root username and password by intercepting and decoding the token and the patched code block fixes the vulnerability by changing the getToken() method to isValidToken() and getToken() methods which check if the token is valid and return a new token that does not contain the root username and password. Additionally, the handleLogin() method in the patched code block now checks if the user is authenticated using a valid token instead of using the vulnerable getToken() method. If the token is valid, the filterChain.doFilter() method is called to allow the user to access the requested resource. Otherwise, the respondWithUnauthorized() method is called to deny access to the user.
UserAuthenticationFilter.java
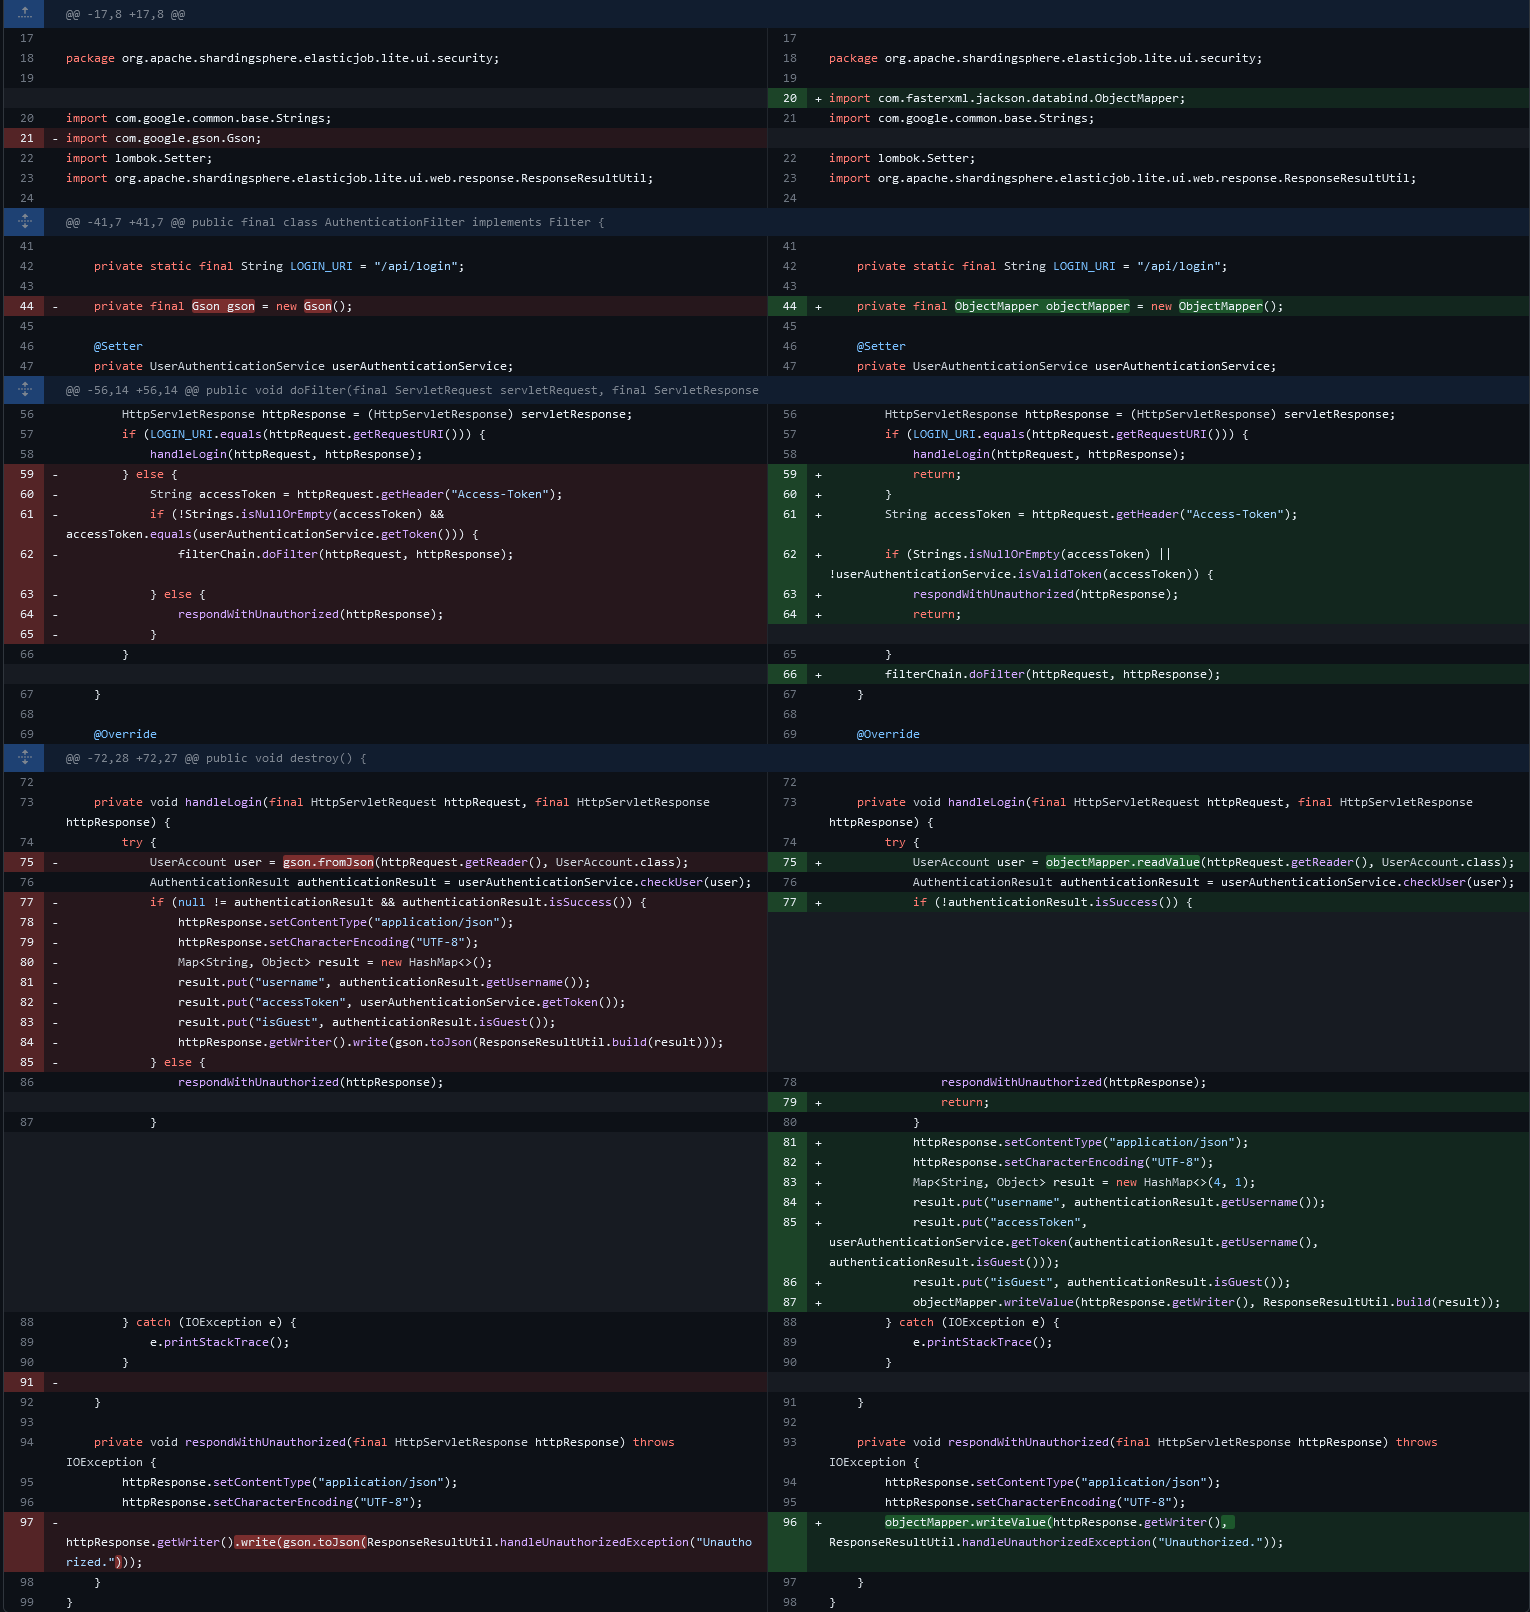
The changes made to the AuthenticationFilter class prevent the vulnerability by implementing token based authentication instead of using a hardcoded username and password. Specifically, Adding the ability to generate a token based on a user’s credentials using the getToken() method in the UserAuthenticationService class. This token is generated using the com.auth0.jwt library and is signed using a randomly generated HMAC256 algorithm and isValidToken() method to the UserAuthenticationService class to check if the provided token is valid or not, Also Modified the handleLogin and doFilter methods. Additionally, the AuthenticationFilter class is modified to use the ObjectMapper instead of Gson for JSON serialization and deserialization. In the handleLogin() method the gson.fromJson() call is replaced with objectMapper.readValue() to deserialize the UserAccount object. Finally, in the doFilter() method, the if statement that checks for the access token is modified to use the isValidToken() method instead of checking for equality with the token obtained from userAuthenticationService.getToken().
Conclusion

At the end, We saw how the vulnerability occured and why, By showing the wrong implementation of authentication process and showed how it’s fixed in the patch applied to the code by using the JWT Library to generate the token with a secret key to which keeps the confidntiality of the data. As a results it’s not exposing the credentials anymore.
Resources
-
https://github.com/apache/shardingsphere-elasticjob-ui/commit/f3afe51221cd2382e59afc4b9544c6c8a4448a99?diff=split
-
https://hub.docker.com/layers/apache/shardingsphere-elasticjob-lite-ui/3.0.0-beta/images/sha256-9e5f309485b252a397f3cf91177be810e0f170349416de377c7393876d1069e2?context=explore
-
https://cve.mitre.org/cgi-bin/cvename.cgi?name=CVE-2022-22733
-
https://github.com/apache/shardingsphere-elasticjob-ui/releases/tag/3.0.0